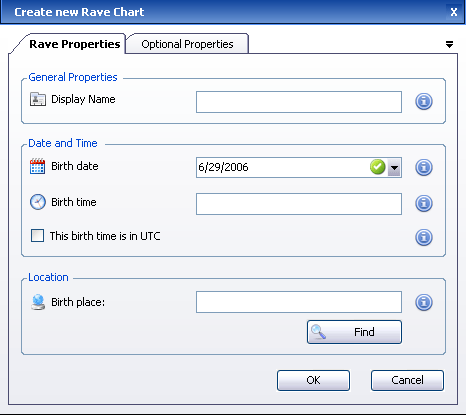
A data entry form is displayed in which you must supply the information based on which the chart will be created.

The Required Information includes:
Display Name
A name for this Rave Chart.
(e.g. Joe Smith , My wedding day etc...)
Birth Date
The birth date or the date of the event for which the chart is being created.
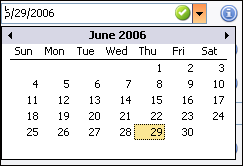
Dates can be either typed in ( e.g. 10/10/2000 , 5.7.2009 ) or entered using the popup calendar which can opened by clicking on the arrow that appears on the right hand side of the entry text box.

The date format ( d/m/y or m/d/y ) settings used are obtained from your Windows regional settings. If you are not sure how your Windows settings are configured, use the built in calendar by clicking on the right hand arrow.
Birth Time
The birth time or the time of the event for which the chart is being created.
The time should typed in a 24 Hour format separated by colons. Hour and Minute are obligatory, Seconds are optional.
( e.g. 17:15 , 14:02:12 )
The precision of the birth time is very important for correct chart generation. Please make sure you have the correct time.
UTC Option
MMI2 uses the built in ACS International Atlas to convert birth times to UTC based on the birth location's time zone and the relevant daylight saving policies for that location.
If you wish to disable the time conversion for this Rave Chart and consider the birth time you entered as UTC click the checkbox.
Birth Place
The Birth Place should be entered as the City Name followed by a comma and then the Country Name ( e.g. Roma, Italy or Paris, France ).
For Cities in the US use the State instead of the Country ( e.g. Los Angeles, California ).
Once the place name has been filled in the 'Find' button needs to clicked in order to validate this location.
If the place name has been successfully validated an 'Add to favorites' button will
appear that will allow you to give this place a name which you could later use as a shortcut.
If the place name was not valid the Find Place dialog will appear which will allow you to select the exact location from a list.
Chart Notes
This optional entry allows you to attach comments to the chart using a built in text editor.